Hidden Ruins Chapter 7 Walkthrough – Help Professor and team up with Rachel, Tawa, and Peter to stop Larissa before she takes the treasures of the Kumari civilization for herself and see if you can survive the Hidden Ruins!

Adventure Escape: Hidden Ruins – Mystery Story Room Escape game by Haiku Games
Adventure Escape Hidden Ruins Chapter 7 Solution
pick up dial on floor and prism on right statue
go to right room and get gloves + sickle on the shelf
use bret to get a dial
go back
use sickle on the left curtain to get a dry banner
tap right wall and get the plug out from the puzzle block
find out step by step guide how to solve it in the video guide
after you get the plug, go to the left
pick up dial on middle ground
use the plug on left fountain ground
use gloves on left ground and get prism
put the dry banner on the fountain to get wet banner
use it on the wall to find some symbols
match the symbols with the fountain to find the value for each symbol
the statue is a man holding a bird, so you need to count on the bird = 5
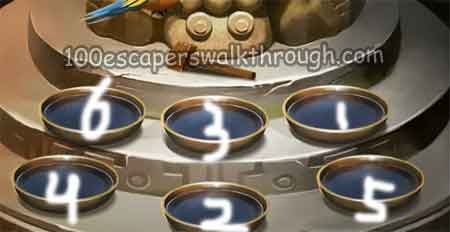
go back to the right room and tap on the left box, enter :
4 x 6
x 5 x
1 x 3
get the last prism
tap on the floor and put the missing prisms, now you need to reflect the laser to hit the ruby diamond
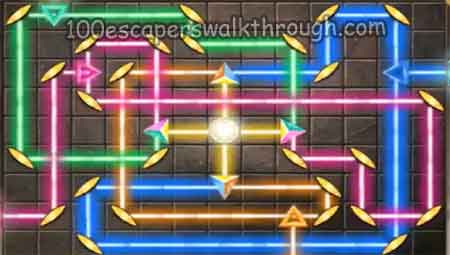
here’s the answer
look at the right scroll for the clue of dial direction
go to the left fountain and tap right ground
put all 3 dial and change the direction like the clue
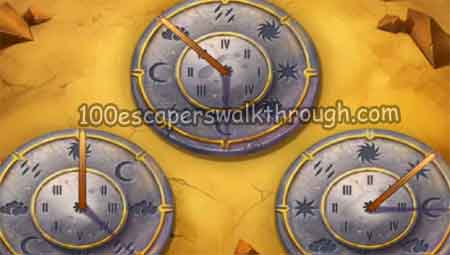
now you need to memorize the order of the sundial note for each symbols
back to the right room and put the memo on the sundials
follow the order from the note + sundial symbols :
cloud III – crescent V – sun I – rain IV – star V – crescent III
obtain a dog tile
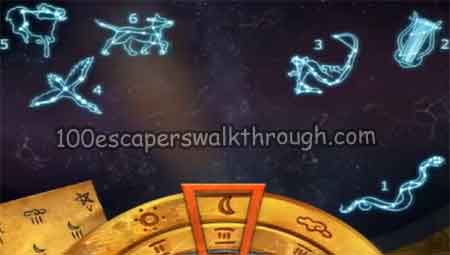
go to the left room and tap on the wall, you will find key of ages puzzle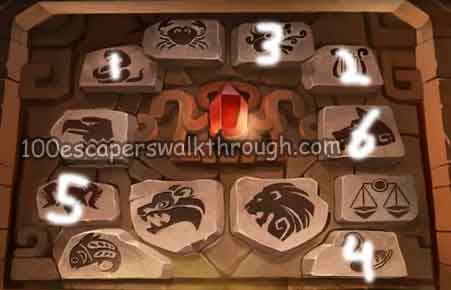
put the dog tile and press on the correct tile order from the sundial star constellation symbols :
snake – harp – dragon – swan – goat – dog
pick up leaf, mallet, twig and all empty bowl
fill the bowls with water, then you need to fix the broken bowl
use bowl with water on right ground then use twig on it
use leaf on the ground to get leaf with clay
use it on the broken bowl to fix it, now you can fill it with water
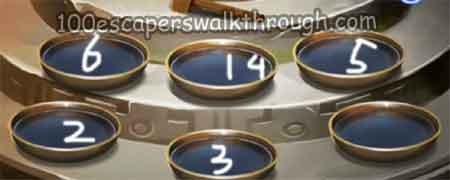
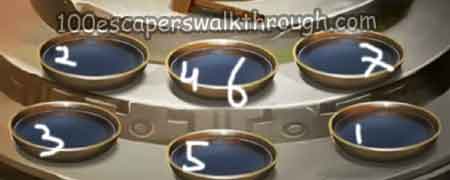
put all 6 bowl with water in front of the statue
put the mallet and bert on statue
now you need to follow bert melody music and use mallet to hit the correct bowl
you also need to solve another color puzzle, rotate the board until the balls end up on their matching squares
here’s the answer for all 3 music puzzle song :
1st color puzzle = 3 right – 2 left
2nd color puzzle = 5 right – 1 left
3rd color puzzle = 1 left – 3 right – 1 left
get the elixir of life and follow the story, the end =)
see the complete Adventure Escape Hidden Ruins Walkthrough