Hidden Ruins Chapter 2 Walkthrough – Help Professor and team up with Rachel, Tawa, and Peter to stop Larissa before she takes the treasures of the Kumari civilization for herself and see if you can survive the Hidden Ruins!

Adventure Escape: Hidden Ruins – Mystery Story Room Escape game by Haiku Games
Adventure Escape Hidden Ruins Chapter 2 Solution
pick up flit rocks, driftwood, mushrooms and unit torch
give the mushrooms to the mouse on bottom right, then use flint rocks to create fire
add driftwood and use it to light the torch
look at the stones and book with codes for animal cave symbol puzzle
from the book clue we can get the value for each symbol :
. = 1
U = 2
S = 3
combine each symbols to get the order from the stones :
squirrel – fish – lemur – bird – snake – boar
use torch on left and right to light up the room
tap the head skulls to get a long bone and pick up the animal skin from the wall
use the bone to pull the left box, dip the animal skin in left oil pot to get greasy animal skin
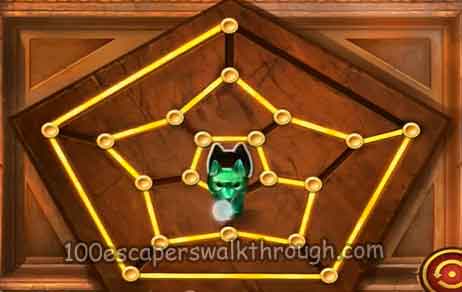
use the greasy animal skin on the ox head to get a Jade Fox Head, put it in the leftbox and solve the puzzle by getting it to the center of the box without it crossing its own path
look at the clue inside box, it’s the combination lock puzzle on right :

Move forward and solve the mushroom maze puzzle
you need to move Tawa one step at a time to the top, using the mushrooms as energy :
6 bars to move with 1 move = 1 bar
take the mushroom to refill your energy full bars
to break the broken floor, you need to step on it twice
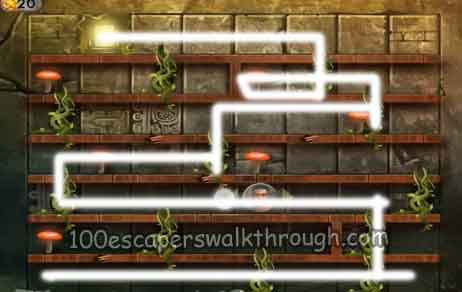
part 1 mushroom maze guide
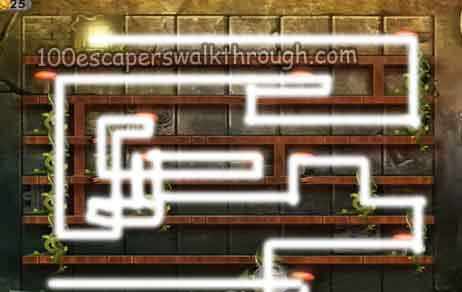
part 2 mushroom maze guide
proceed to hidden ruins chapter 3 or see the complete Adventure Escape Hidden Ruins Walkthrough