Hidden Ruins Chapter 1 Walkthrough – Help Professor and team up with Rachel, Tawa, and Peter to stop Larissa before she takes the treasures of the Kumari civilization for herself and see if you can survive the Hidden Ruins!

Adventure Escape: Hidden Ruins – Mystery Story Room Escape game by Haiku Games
Adventure Escape Hidden Ruins Chapter 1 Solution
get the machete and use it to cut the vines, pick up the shovel and use it on the tablet stone stuck in the ground
use the clue from the tablet symbol for each direction of the symbols on the door tree

match them and then the door will open
get the torch and use the fire to light it, then lit the oil lining the bridge
tap on the correct stone steps to cross the bridge without falling, there’s the answer :

go to left door cave and get the ceremonial dagger, then use it to cut the vines
get the vines and move the rock to find 2 parts of a scythe
use vines to combine the item and get the scythe
go to right door cave and use dagger to cut the tree, get the scroll and 3 pottery shards + leaf
use leaf to collect sap from tree, then tap the broken pot
place all 3 pottery shards and connect the pot back together
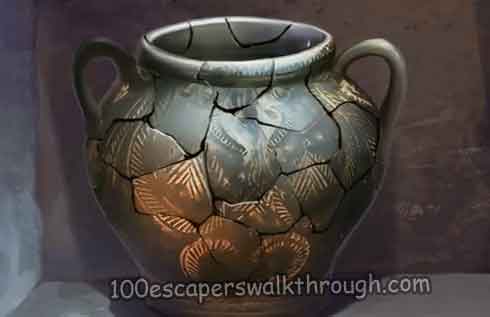
use the leaf sap to glue it and pick it up
use the clue on cave wall to figure out which items for the correct statue :
“These people are at war.” — hawks = ceremonial dagger
“Looks like some people are farming.” — ox = scythe
“The snakes are wrapped around an urn.” — snake = pot
“That man should watch out for those crocodiles.” — crocodile = scroll
pick up Key of Ages and follow the story
proceed to hidden ruins chapter 2 or see the complete Adventure Escape Hidden Ruins Walkthrough